Equipment & Techniques
Fine-needle aspiration (FNA) is used to obtain a sample from a mass or organ for cytology and/or culture. It is a simple yet powerful tool that can be used in a variety of situations. It can provide a definitive diagnosis for some tumours and help guide the treatment of infectious processes. Ultrasound-guided FNA reduces the risk of blind procedures, as blood vessels and vital organs are identified and the ideal needle path determined.
What You Will Need
Very little equipment is needed to obtain good samples for cytology and culture, but all the necessary materials should be set out and ready to go before you start.
-
-
-
- Needles (Gauge dependent on lesion and tissue type – as a guide, use 25-g needles for very small masses, up to an 18-g needle for bony lesions. Length dependent on lesion depth).
- 5 mL syringes
- 5 to 8 glass microscope slides laid out individually
- For sterile techniques – sterile probe cover (or sterile glove) with ultrasound gel inside
- Use alcohol as contact medium
Lining Up the Probe and the Needle
Ultrasound-guided interventions require good hand–eye coordination with respect to probe control and needle orientation. See Part 1 of this series for how to make a jelly phantom for practicing the techniques.
-
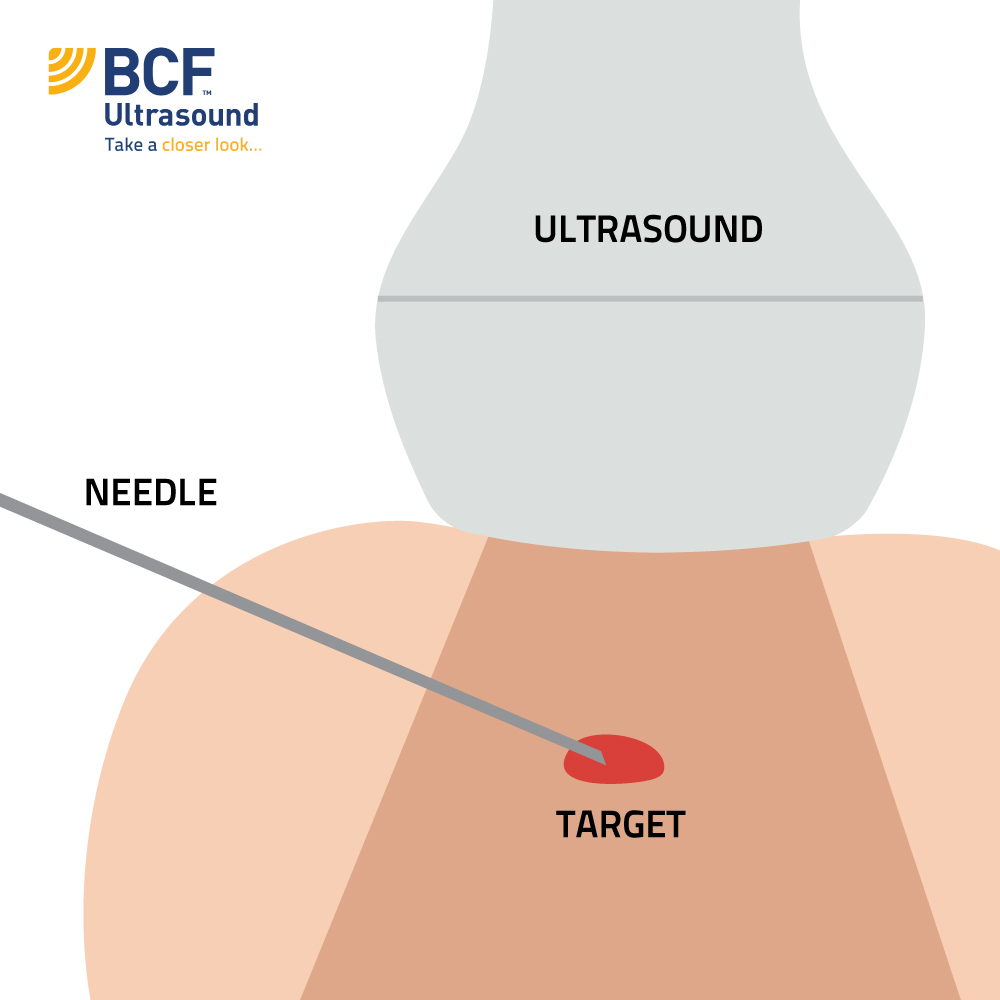
- We recommend an “In-Plane” Approach in most cases. The needle is inserted parallel to the US beam and the shaft of the needle is seen as an echogenic white line. Alignment of the ultrasound beam and the needle in this approach is the major key to success, and it takes a lot of practice to master. The target structure is usually placed to one side in the ultrasound field, and the needle is advanced from the other side towards the target, usually at an angle of 45° or less.The major advantage of this approach is that the needle tip is identified more easily. Insert the needle with the bevel pointing up. An air bubble trapped in the bevel pointing this way will allow you to see the tip more clearly.With this technique, the needle course is seen only in relation to the target of
 interest and not in relation to adjacent (lateral) structures, which are outside the ultrasound beam. The main cause of losing the needle with this approach is due to far misalignment of the needle with the ultrasound beam. If the needle disappears, alignment should be checked by inspecting the planes of the needle and the probe directly from above and moving the probe to regain alignment (never try to move to needle to the probe or move both at the same time!).
-
Considerations
The needle should not be advanced without visualisation of the needle tip.
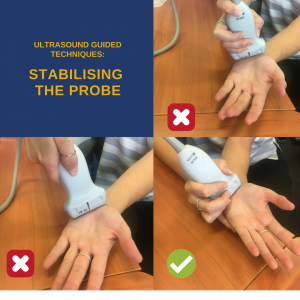
You should always have a point of contact with the patient – the hand that holds the probe should have 1 or 2 fingers resting on the patient to stabilize the probe and avoid unintentional sliding.
It is not always possible to align the needle, the probe and the target structure
This technique requires longer needles to be used.
Obtaining The Sample
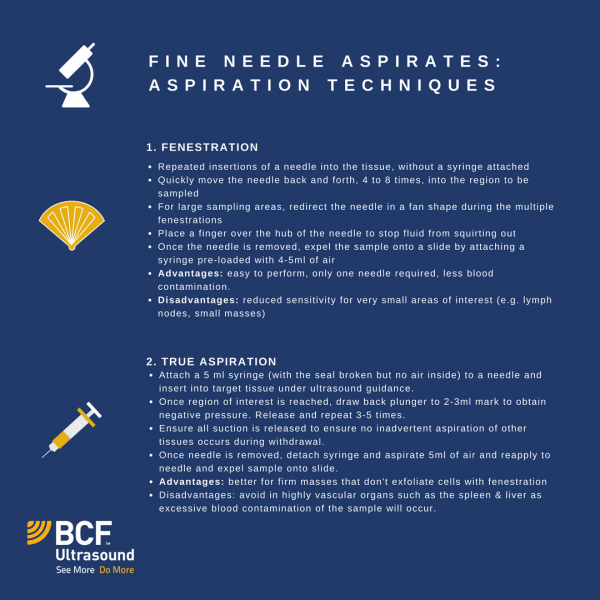
Once you have mastered inserting the needle in the correct plane, there are 2 ways of obtaining an actual sample: Fenestration and Aspiration.
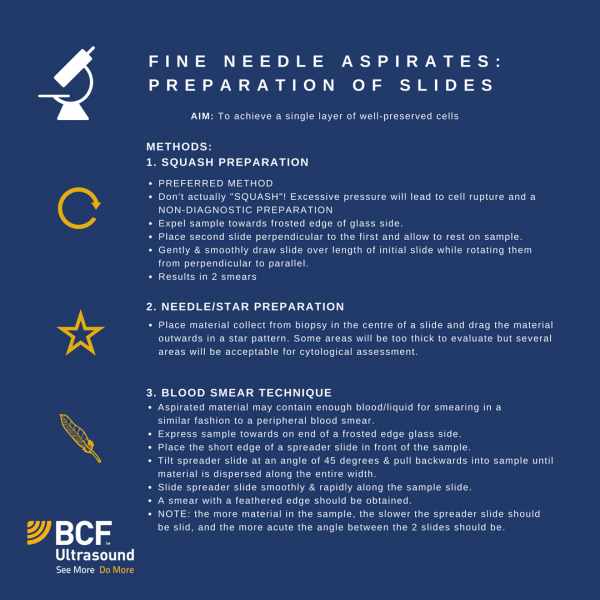
Once the samples are obtained, they should be quickly expelled, as they can rapidly clot, making smear preparation difficult.
Here is a quick review of the techniques that can be used for sample preparation:
References:
- Garrett L (2010). Fine-Needle Aspiration. NAVC Clinician’s Brief.
- Stone B & Reppas G (2010). Cytology Sample Collection and Preparation for Veterinary Practitioners.
- Mikhael R & Margarido C. Needling Techniques.